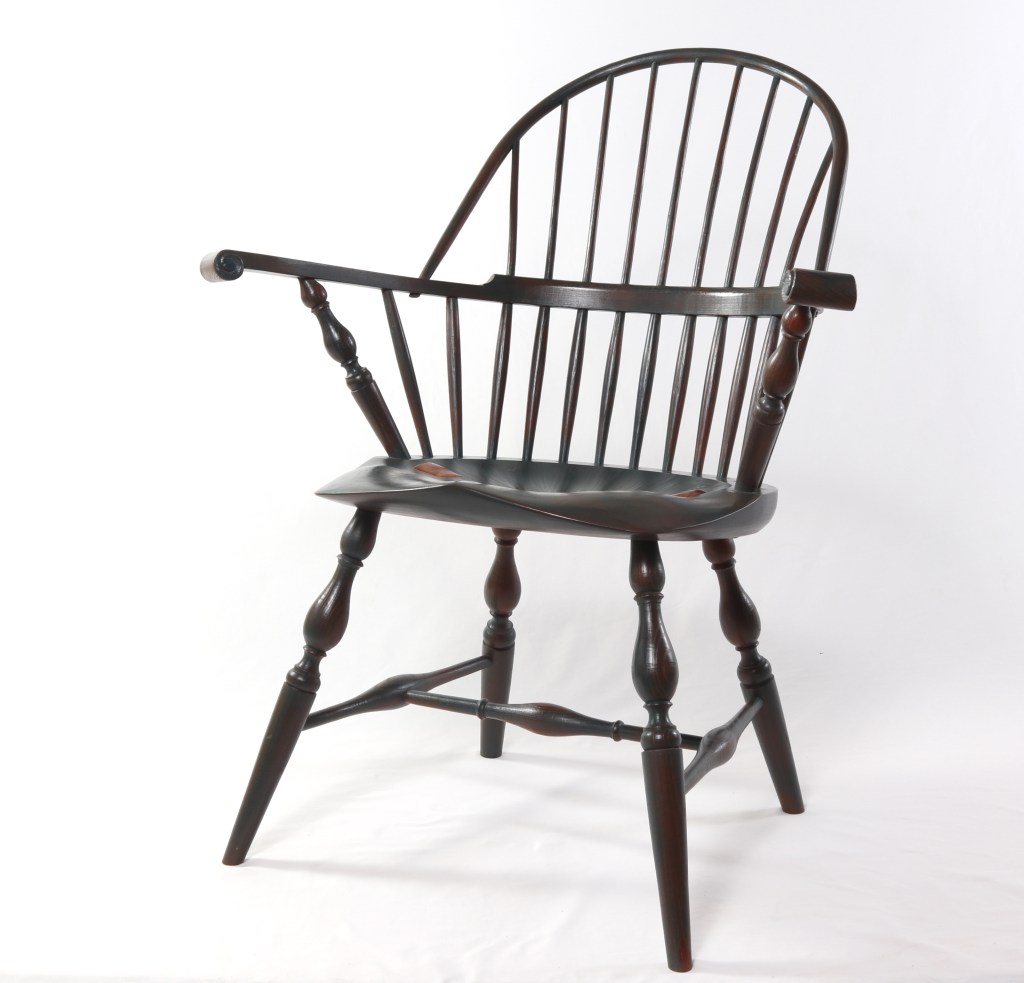
I just wrapped up work on this prototype Sack Back style Windsor chair. It’s a leap from the Comb Back I talked about in my previous post, all the angles from the feet to the arm bow are the same. I made some minor tweaks to the style of the turnings and knuckles, but the only major differences are the back bow and style of the seat.
The back bow, or hoop, is the most essential element to the style. For this chair I wanted the bow to land in roughly the same path of the spindles in the Comb Back. That makes the two chairs offer nearly identical support to the body.

The traditional seat for this type of chair is an oval with the grain running side to side (as opposed to the Comb Back whose shield seat has grain running front to back). The oval seat is often very narrow from front to back, so much so that the knuckles reach out past the front of the seat. To me it’s a gawky look but all makes sense, from what I’ve found the Sack Back was streamlined to be a more budget friendly armchair. Shield shaped seats are better suited for the Comb Back where the ramps (the curvy pedal bits to the side of the seat) are reflected in the ears of the comb. The Sack Back is all about curves, positive and negative curves, man. As a happy medium, I came up with this sort of hybrid shape, grain running left and right.
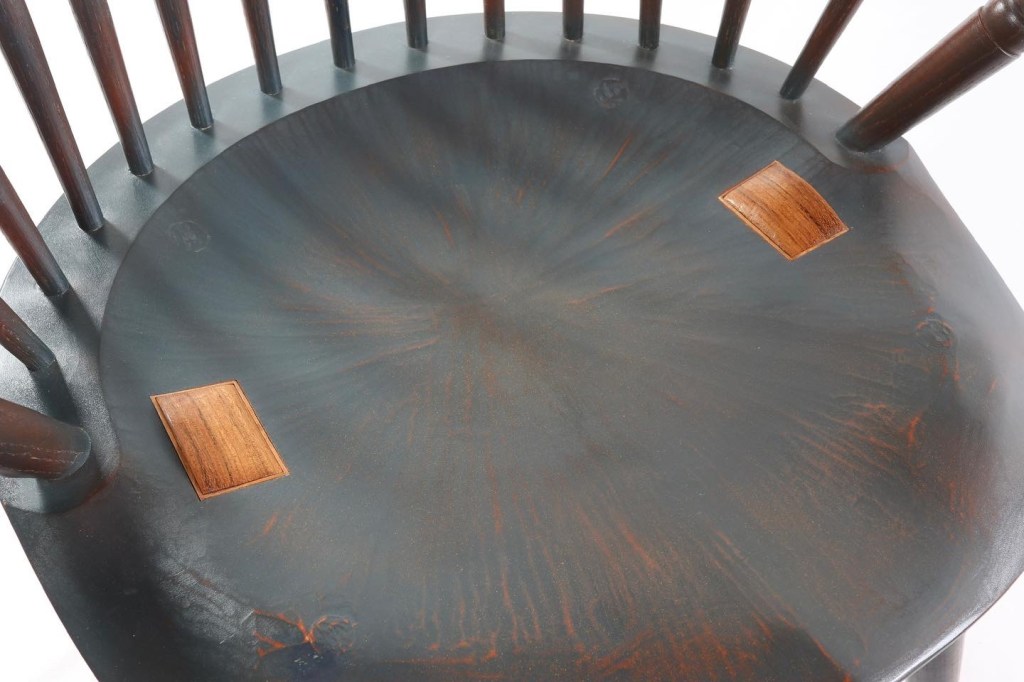
Common practice is to scrape and sand the seat smooth after shaping, but in recent years it’s been a trend to leave (or even go back and add) tool marks. It’s not a new idea but the broad desire for these facets, inconvenience of scraping and sanding, and my own proclivity for making hand planes had me wondering if I could do it tastefully on one of these classic chairs. I made two small planes (convex in both directions) for the final shaping and aimed to get the seat as smooth as possible, knowing the contrasting paint would amplify any texture. The result is bound to be polarizing, but the process was a pleasure and definitely something I’ll keep playing around with.
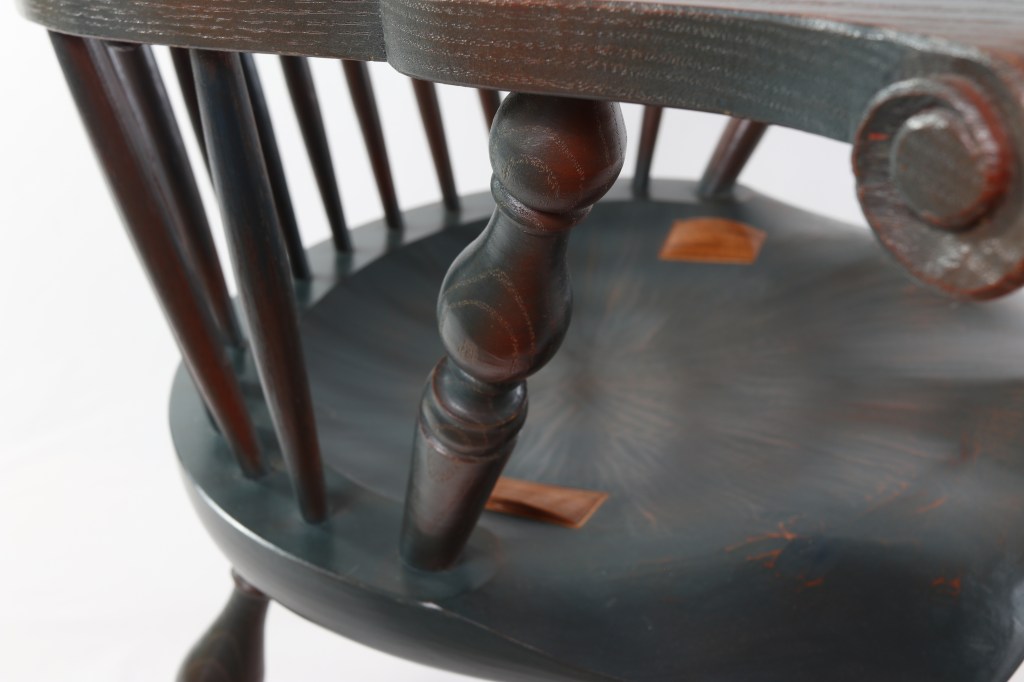
Paint is almost a given for Windsors, so color and finish are always variables. Since this chair was bound for my living room, I wanted to experiment with the painting process. From a distance it can look black, brown or green but up close you’ll see its a dark blue/green/orange ombre. Capturing the effect is beyond my own photography skills. And so is describing it, so just look at the photos and know that it’s not the red light on the camera. After painting I rubbed on a coat of boiled linseed oil to bring depth and saturation to the colors, and finished off with shellac and wax.

I won’t go into detail about the paint process just yet, because it wasn’t without a hitch. A few very small spots (and the better part of the back of that spindle bulb) were rejecting the paint. It’s not a concern for me, the rest of the surfaces held up great through the rigorous burnishing process. I’ll touch up these spots on this chair, and keep experimenting to work out any kinks. The effect is worth pursuing.
On to the next classic design, one to which I’m really looking forward to adding my own touch.
